Overall, I am happy with how my gorilla turned out. Keeping him 'civilised and sensible' was a good move I feel, and the butler apporch worked well for this too. I've learnt a heck of a lot doing this project, more than I thought I would for sure. Most of it was learnt out of college through tutorials and getting advice from mates for how things were looking etc.
I have enjoyed it a lot, and can see why a lot of people want to go into modeling, but for me its the animating that still does it. I like to bring things to life and create a character through the animation - but if there models were there then I couldn't do this!
The lighting was probably my favourite part, and painting the textures on because its doing one thing, checking it and seeing an improvement quite fast. All in all it has gone pretty well with only a few hiccups here and there!

Monday 10 January 2011
Pose, Turntable, Video, Photos
Okay boys and girls, here is my final render in all its glory (click photo for hi-res version):

This is an edited version i did just to add to the depth of the render (click for hi-res version again):

YouTube hasn't really done much for the quality, but I assure you it looks nice! I rendered it as Tiff and put the image sequence into After Effects and then rendered it out of there ad a Quicktime movie.
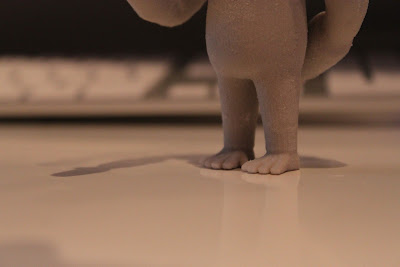
Just a quick video i shot of my character. Its the 3D printed model! I am really happy with how it came out! If you watch this one in HD its better :)
Photo time!


This is an edited version i did just to add to the depth of the render (click for hi-res version again):

YouTube hasn't really done much for the quality, but I assure you it looks nice! I rendered it as Tiff and put the image sequence into After Effects and then rendered it out of there ad a Quicktime movie.
Just a quick video i shot of my character. Its the 3D printed model! I am really happy with how it came out! If you watch this one in HD its better :)
Photo time!


Bored now...
As my turntable is rendering and will be for another few hours or so, I've been doing my blog. Now I'm pretty much bored and done. I think i'll take some nice close up photos of my printed model and video him too!
Out with the old, in with the new!
Maya 2011 is now mine and i have some a few tests and i am able to render! wooo! Now time to get this turntable done and rendered.
Maya 2010 broken! Ahhhhh!
When i came to render, it was having none of it, it just kept saying 'batch render complete' and it had done nothing! Then it completely froze my Maya and just quit itself. Now I'm worrying.
Lighting - i have no idea what im doing...
Never done lighting before! so i stuck an ambient light in there and...

Deary me, thats shocking. Time for some tutorials!
Aftr having a look around for some methods on soft lighting, i couldnt find anything that applied to me and how my intentions where for lighting my scene. I want it to look realistic, with a cartoon edge and obviously as he is made of clay. Time to get serious!
I started to play around with Global Illumination and redner settings to create the lights i wanted. I started off by adding a point light and playing with some settings there. I ended up having a few lights for different objectives. First i had one above him to light him, then i had one for shadows, one for lighting a specific side of him, another for a second shadow, a spot light for the wall lighting and another to just be safe!

On the shadow light, i was playing around with the global illumination and render settings so i could get my scene looking exactly how i wanted it.


Okay so i gotta start somewhere right?


I can defiantly see I'm getting close now, and its looking quite nice and exactly how i wanted it.


Okay now its almost done, i just need to sort out the soft shadows because I'm not happy with how harsh they are at the moment.


Finally!
I am pretty happy with this now, lighting wasn't so bad, but it defiantly upped by render time to a few minutes. Time to stick a camera in and then get my pose all rendered nicely and then turntable time.

Deary me, thats shocking. Time for some tutorials!
Aftr having a look around for some methods on soft lighting, i couldnt find anything that applied to me and how my intentions where for lighting my scene. I want it to look realistic, with a cartoon edge and obviously as he is made of clay. Time to get serious!
I started to play around with Global Illumination and redner settings to create the lights i wanted. I started off by adding a point light and playing with some settings there. I ended up having a few lights for different objectives. First i had one above him to light him, then i had one for shadows, one for lighting a specific side of him, another for a second shadow, a spot light for the wall lighting and another to just be safe!

On the shadow light, i was playing around with the global illumination and render settings so i could get my scene looking exactly how i wanted it.

Here are some renders of how it was looking as i was experimenting with the intensity, radius and merge distance...


Okay so i gotta start somewhere right?


I can defiantly see I'm getting close now, and its looking quite nice and exactly how i wanted it.


Okay now its almost done, i just need to sort out the soft shadows because I'm not happy with how harsh they are at the moment.


Almost...

Finally!
I am pretty happy with this now, lighting wasn't so bad, but it defiantly upped by render time to a few minutes. Time to stick a camera in and then get my pose all rendered nicely and then turntable time.
Scene time
I set up a plane for a wall behind him and a ground plane. I put a shere around the whole lot so when i come to lighting it will help with the soft lighting and natural look - hopefully! I lamberted the planes to a light yellow/grey colour because i think this looked quite natural and would help with the lights in the final render.


Now for the lights and camera!


Now for the lights and camera!
Back to maya...
Now as he is all posed i put him back into maya and re-directed the textures back to him.

 I raised his eye brow in Zbrush for some extra personality

it worked! amazing! i added the shirt and bow tie and just tweaked the surface of him a bit more and hes finished! I am really happy with how he has turned out, considering this is my first character model and pretty much my 3rd model i have ever made!

Posing again after UVing...
Back in Zbrush i started to move my model around again. I decided to pose him how i had him for print as this was a nice butler pose. I think its a strong pose too. This time i moved his face around too, so give him some more personality.


Bump map
As i want my model to look like clay, i thought abump map would be pretty cool to do, do give it an extra bit of 'oomf' for the final render, so i tried to get one set up. As i was dong this, i found out that because i had taken my model apart to UV it, it was pretty much near impossible to bump map him because there were loads of holes, even when i merged the verts back together. I spent about 5 hours trying to get it to work because i really wanted this to happen, but in the end i had to come to terms with it just not working.
After this, in maya i played around with the scultp geometry tool, to give him some bumps and knocks on his surface too try and make it look as is he'd been modeled out of clay or plasticine. I was happy with how things were going on the test, so i decided to keep what i'd done and now for posing!
I had to change some setting and experiment with how much i wanted the tool to do etc.

Here are some screen shots of my bumpy surface:

Sunday 9 January 2011
Texturing!
Here we go, all textured and looking okay-ish. Im pretty happy with how its turned out, but the textures are mad detailed. I didnt want them to be because im sticking with the 'clay' look, so i want to keep the colours simple, bold, and original. Here is the texture of the gorilla as a whole.


Thankfully, i unwraped it quite well, so that it wasnt completely crazy for me to texture and get totally confused! Anyway, here it is. I used photoshop to texture it, but creating layers for each colour and i kept checking back in maya to see how it looked by updating the uv network in the uv texture editor.
Shirt and Bow tie
For his personality which i have chosen to be a butler, i have given him a shirt 'bib' and a bow tie! here are the UV maps of these two and textures for them! These were done is photoshop, as i have explained on the body texture above.


Friday 7 January 2011
UV day two...
Wasn't happy with the face so i have started that over again and i am much more happier with it now. Okay so he is all uv'ed! I took him apart totally for this, but i will put him back together so when i texture him he wont have lots of seems and edges all over him.

Here is the map ready to texture!


Here is the map ready to texture!

UV day one...
Okay so ive started about 3 times now because i wasnt happy with it, but here is how im getting on with it now


UVing. Oh dear...
Never done this before, so ive been looking at some tutorials on the internet to see how its done. pretty much every tutorial/video shows a slighty different method of how to unwrap and texture, but i have found a nice simple way which i am going to use Heres the video i took it from:
I used this as a basis and just played about for a few days to get used to UVing, and finally got the jist of it
I used this as a basis and just played about for a few days to get used to UVing, and finally got the jist of it
Netfabb
To be printed, my model would have to be a perfect mesh with no faults or verts out of place, so i ran him through a program called netfabb which basically fixes models to be ready to print. Mine was all good and came out 100% fixed so off to the printer!


Subscribe to:
Posts (Atom)